Getting Started
Two things stand between you and your first analysis: logging in, and setting up a project.
Log In
Go to app.loonar-ai.com and enter your credentials to access the platform.
- Enter your email address in the EMAIL field.
- Enter your password in the PASSWORD field.
- Click SIGN IN.

noreply@loonar-ai.com with a link to set your personal password. The link expires within
1 hour of receiving it. If it has expired or you didn't receive it, email
matteo@loonar-ai.com and a new one will be sent to you.
Set Up a Project
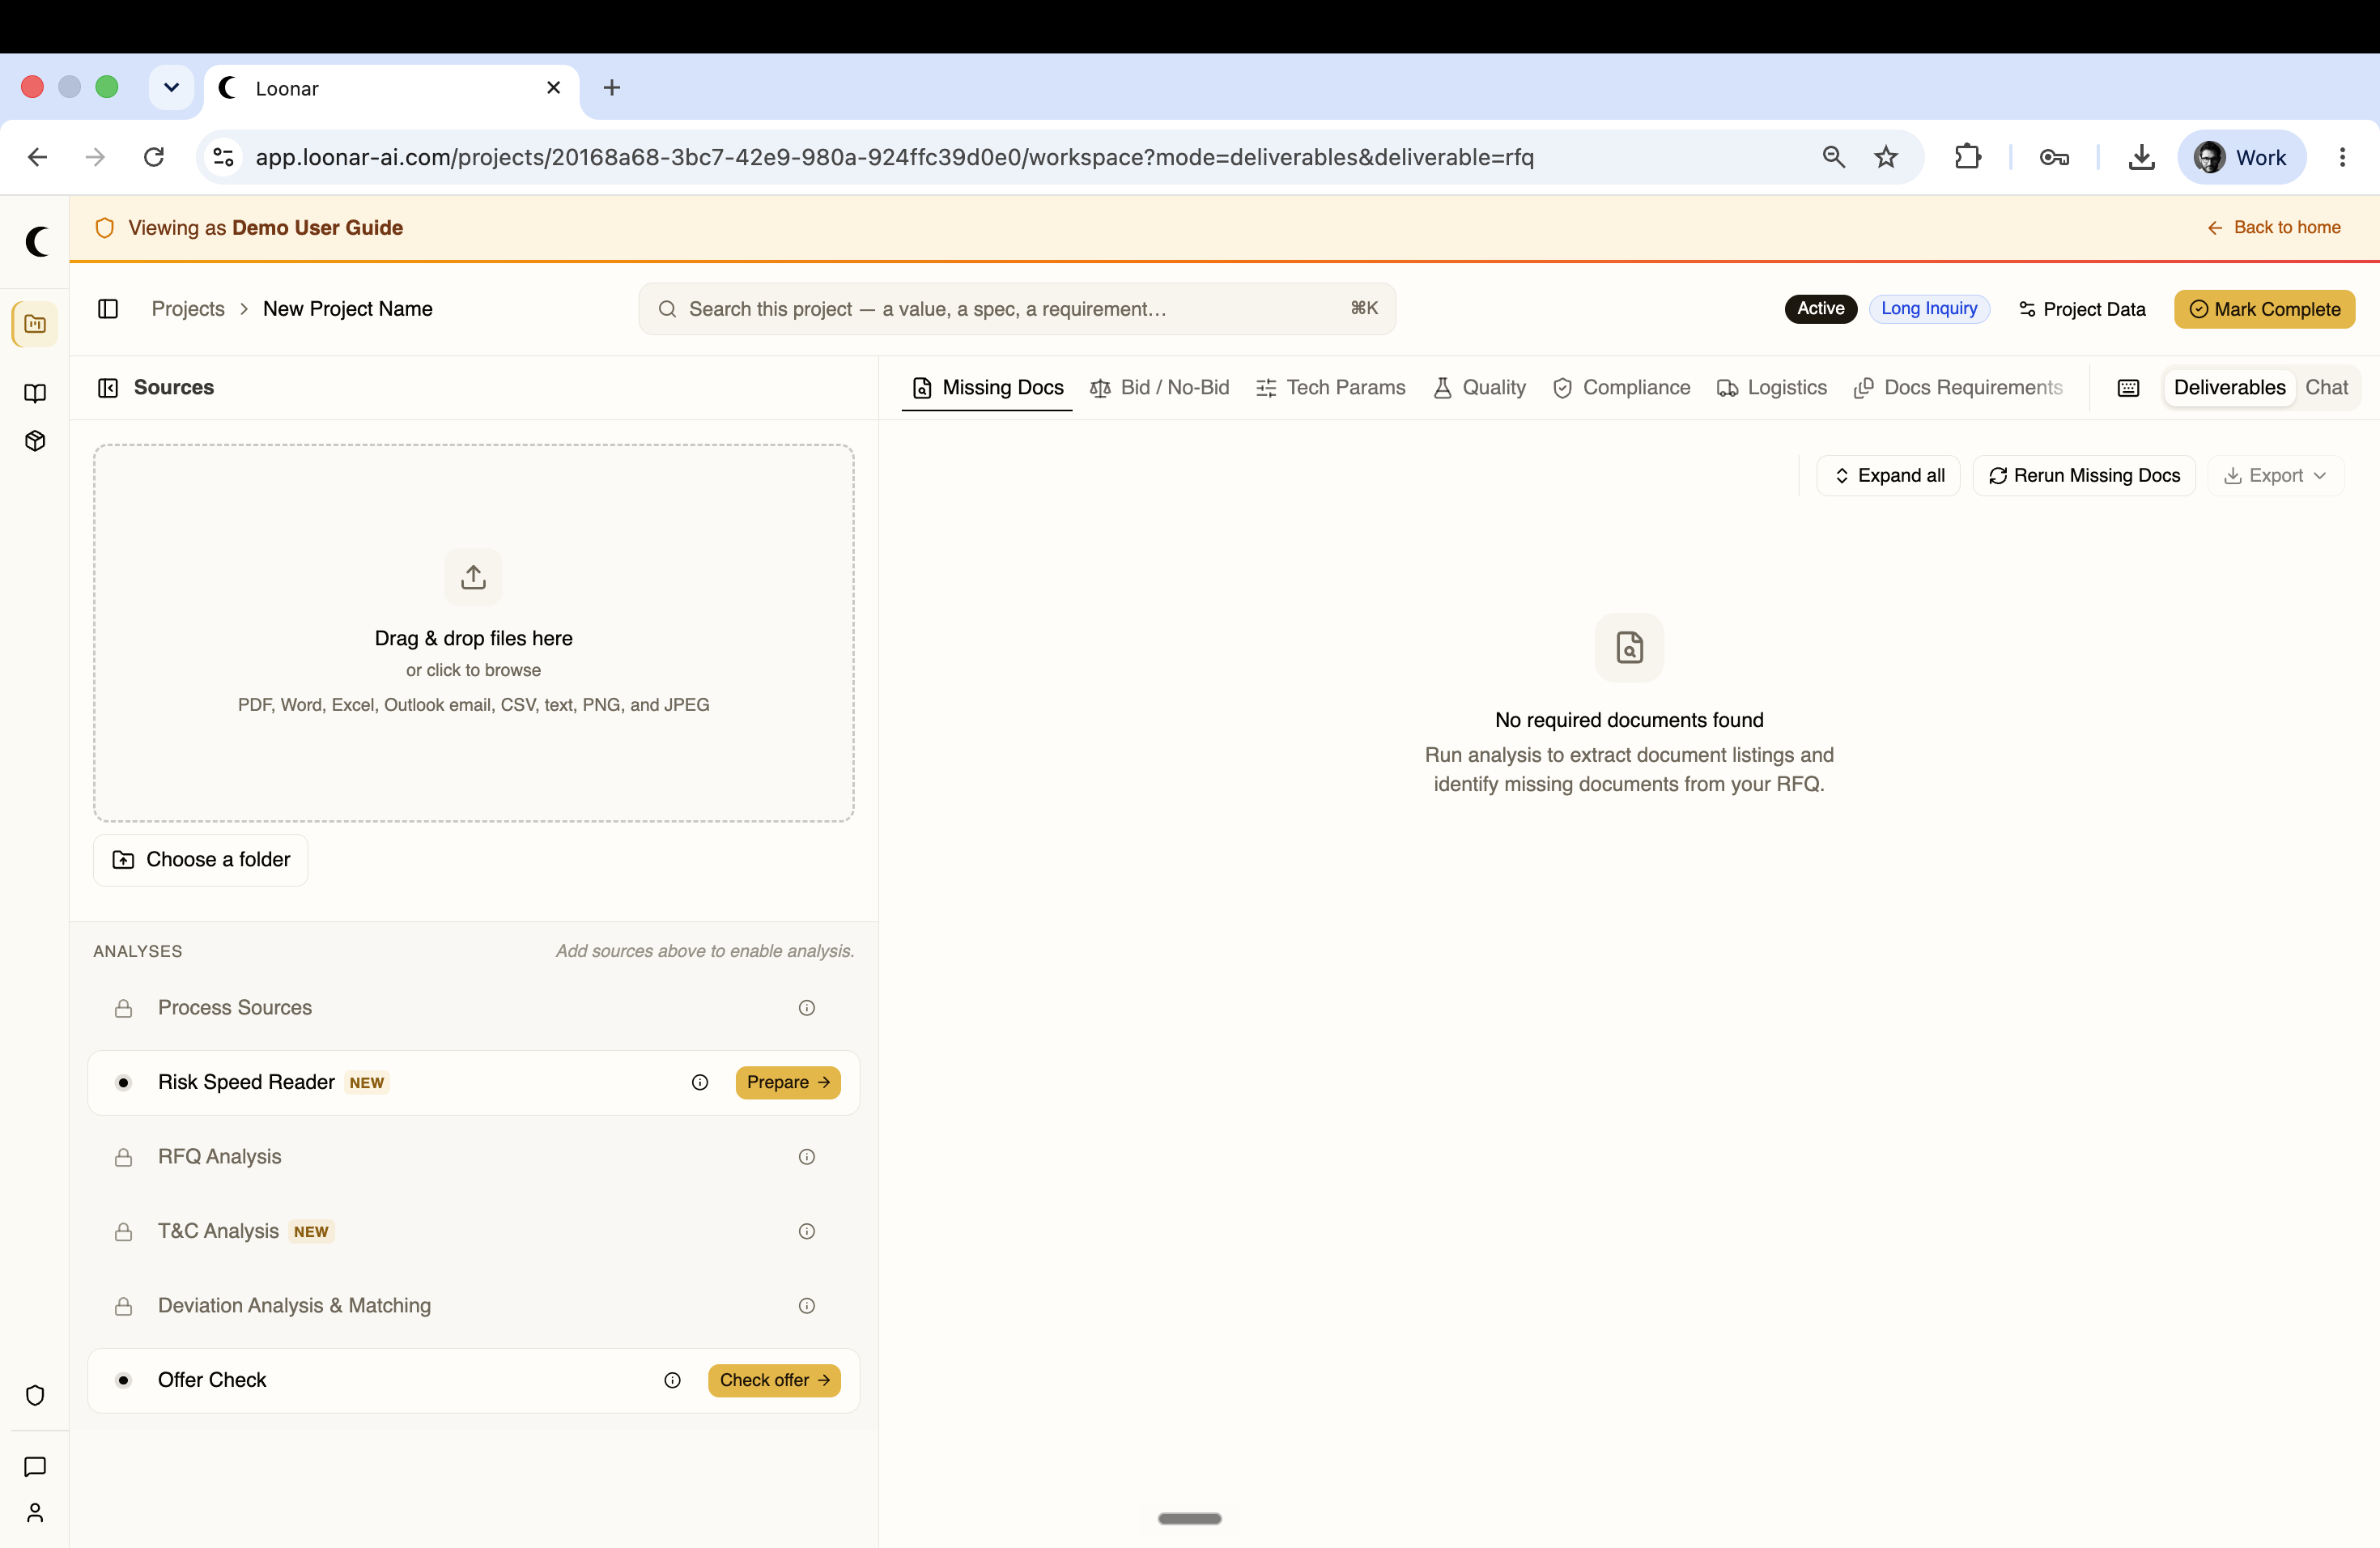
Projects page — the Projects page is the first thing you see after logging in. It lists all your projects and lets you create new ones. Each project card shows the project name, its status (Active or Complete), the client, and who's on it. Use the search bar to find a project by name, client, or project number; filter by status or client, and sort by recency. Click on any project card to open it.
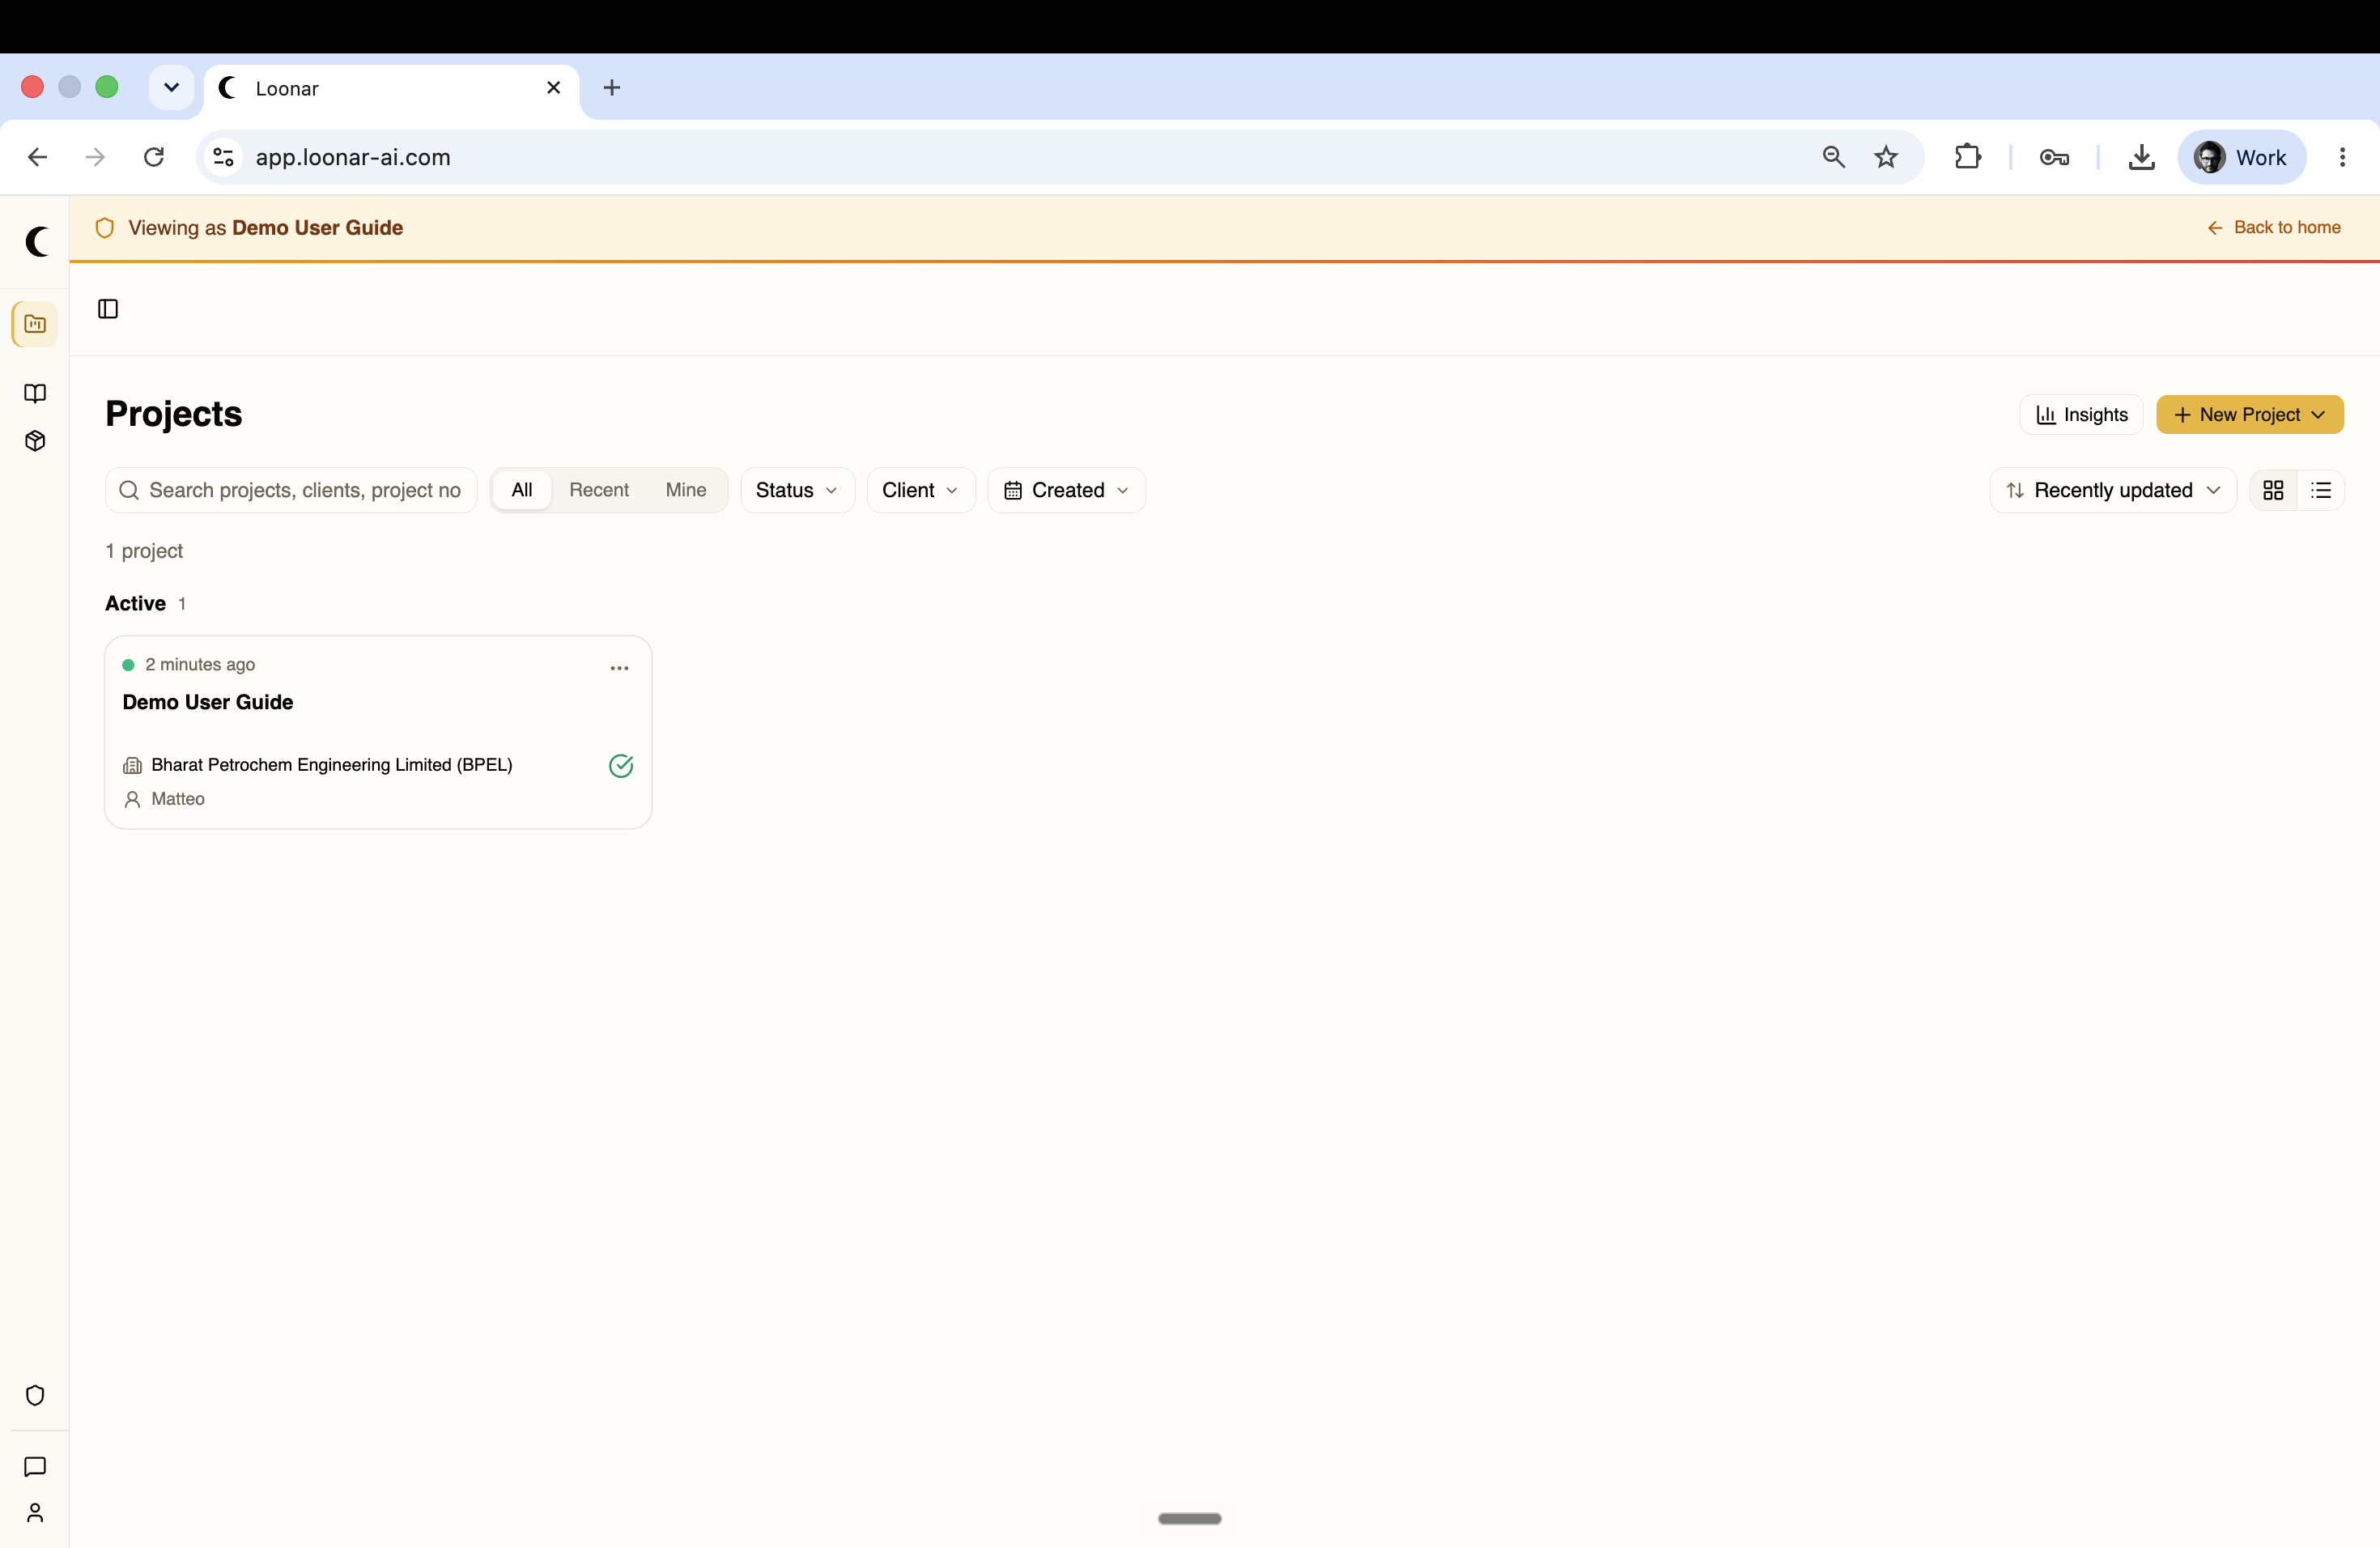
Create a project — to start a new project, click + New Project in the top right corner. A dialog will appear. Fill in the following fields:
- •Title (required) — give your project a clear name, for example the customer name or tender reference
- •Description (optional) — add any notes or context about the project
Click Create Project. The project will open immediately.
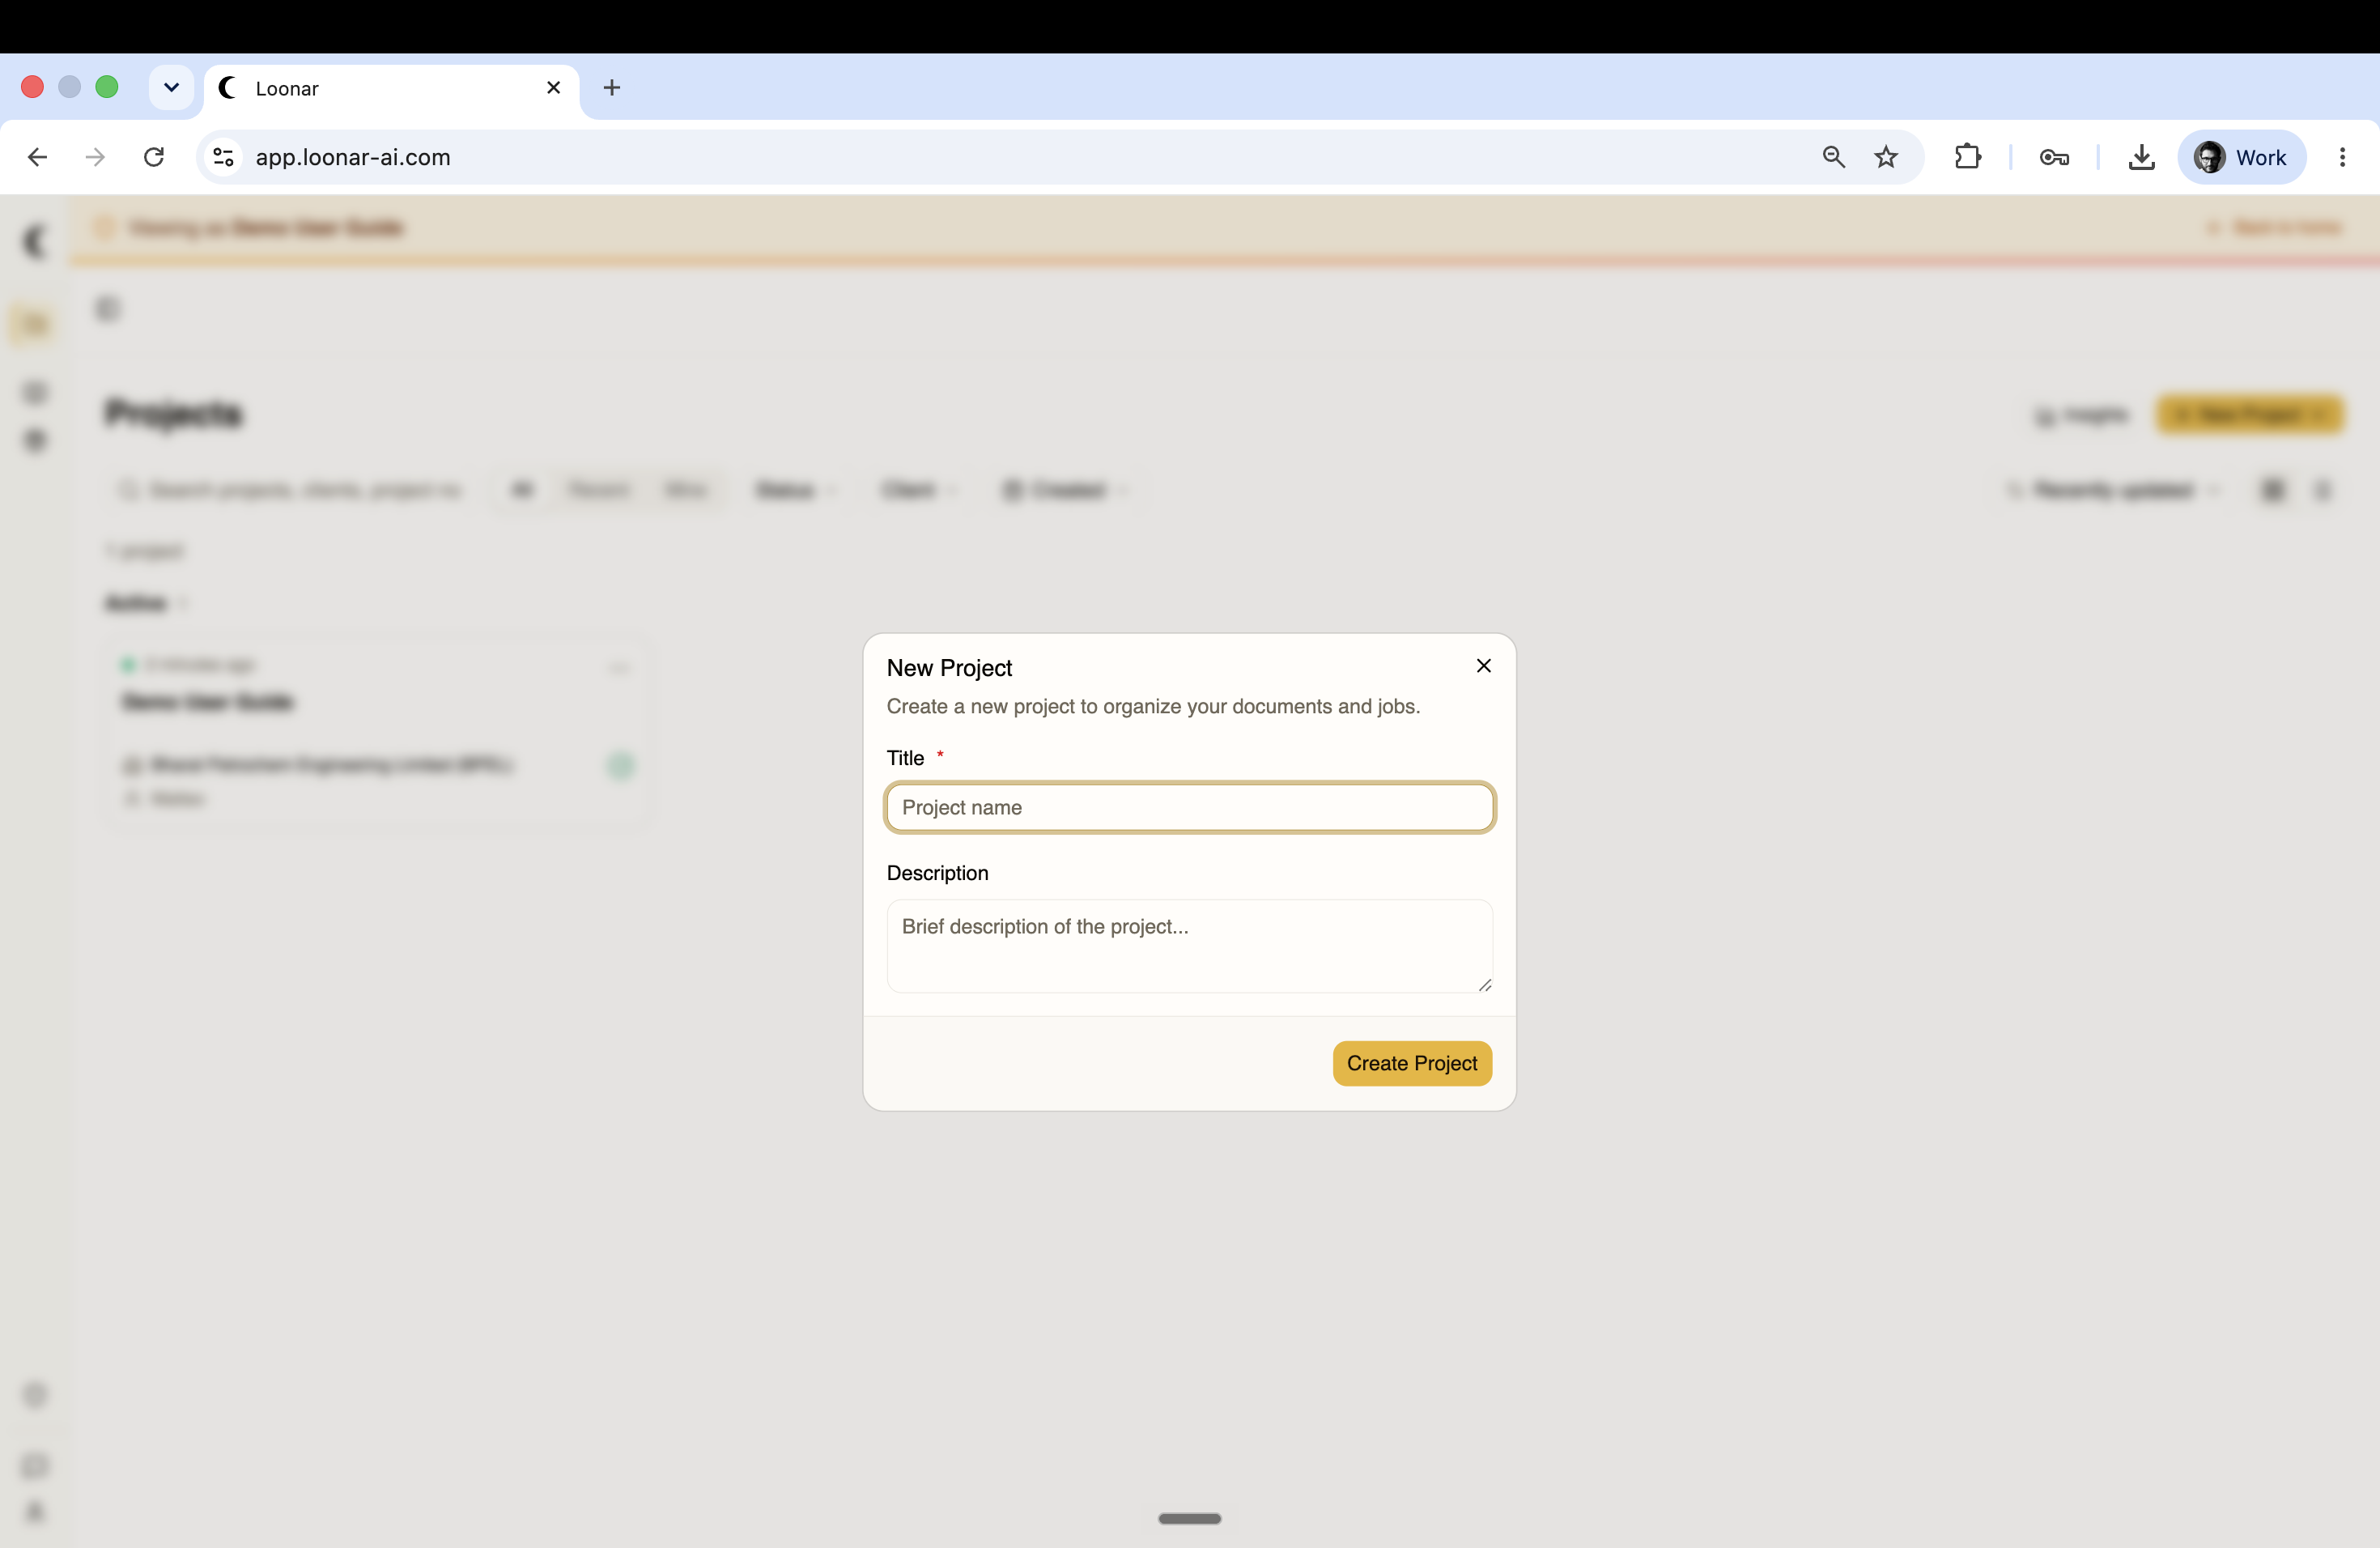
Upload documents — once your project is open, you will see the Sources panel on the left side of the screen. This is where you upload all the files related to the project.
Drag and drop your files into the upload area, or click on it to browse your computer. You can also click Choose a folder to upload an entire folder at once. Supported formats: PDF, Word, Excel, Outlook email, CSV, text, PNG, and JPEG.
Run the analyses — below the upload area, the Analyses list shows everything available for the project: Process Sources, Risk Speed Reader, RFQ Analysis, T&C Analysis, Deviation Analysis & Matching, and Offer Check. Most of these are locked at first.
Run Process Sources first — it reads and classifies everything you uploaded. Once it's done, the other analyses unlock, and you can run them one at a time or all together from the Deliverables tab.